
Welcome to our guide on sending your first conversation with Vesalius!
This document is designed to walk you through each step of the process, from setting up patient details to choosing the questionnaire and sending options. With straightforward instructions and useful tips, this manual ensures that sending your first conversation is smooth and hassle-free. Whether you're using Vesalius for the first time or need a refresher, this guide provides all you need to get started confidently.
1. Check token balance
Before sending a conversation, ensure you have enough tokens in your account. Since 1 conversation = 1 token, if your balance is low or empty, you can always add more tokens in the settings menu.
2. Click the "+" button
To create a new conversation, click the "+" button.

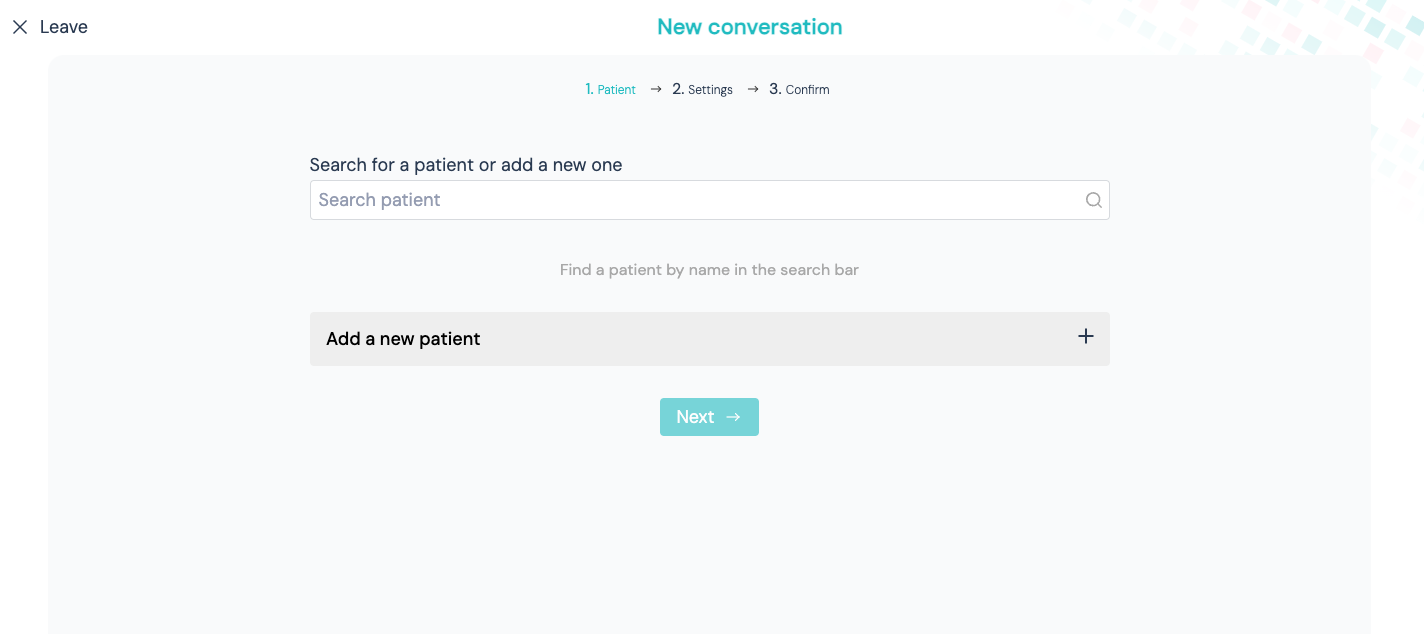
3. Search or add a patient
If the patient has previously filled out a conversation in your practice, search for the patient and easily resend another conversation.
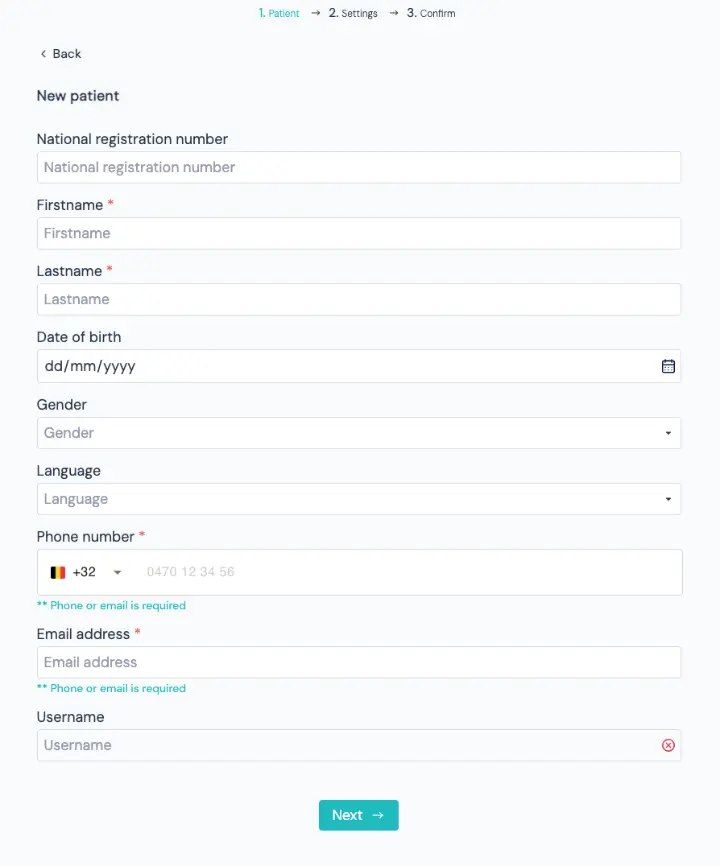
If the patient is new to Vesalius, click "Add new patient" and complete the required fields:
National Register Number | Enter the patient’s national register number. |
First name* | The patient’s first name |
Last name* | The patient’s last name |
Date of birth | The patient’s birthdate |
Gender | Select the patient’s gender |
Language | Here you choose the language in which the conversation will take place (for now, this is limited to French, English, and Dutch). |
Phone number** | Required if sending via WhatsApp |
Email** | Required if sending via email |
Username | This is automatically generated by the platform |
* = mandatory, ** = Partially mandatory
For example:
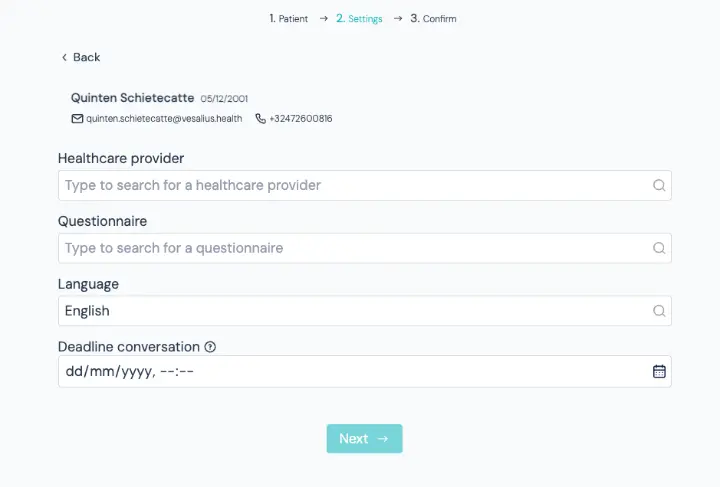
4. Select the physician and questionnaire and language
Choose the corresponding physician and the specific questionnaire you want to send. Select the language in which the conversation will be conducted. This is usually set to the patient's language by default, but more languages are supported for the conversation than for patients. You can set a deadline for the conversation, such as the date of the appointment, which helps organise the summaries by day.
5. Choose the sending method
Your available sending options depend on the contact details provided:
Both are available for you to choose if both phone number and email are provided |
|
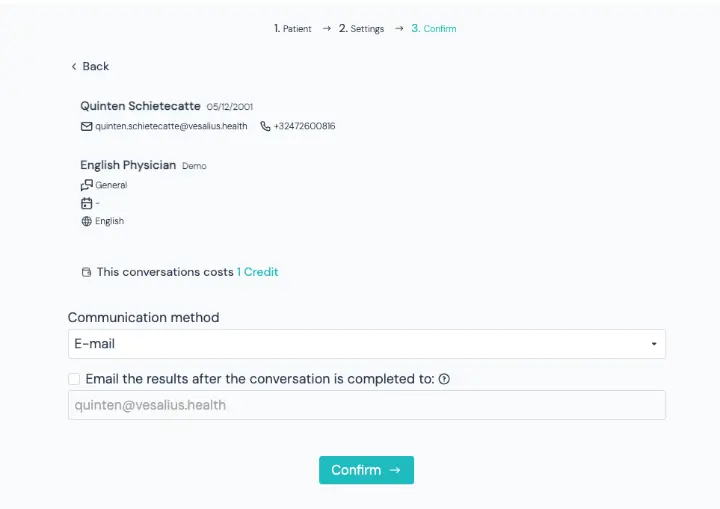
6. Confirm and send
Once you've selected the sending method, click Confirm. The patient will receive the conversation via the selected channel and can complete it through the chatbot.
You will be redirected to the conversation details page that will look like the screenshot below.
7. The patient now completes the conversation
It’s now up to the patient to complete the conversation via the channel you selected.
|